Replacing a roof is a significant investment for homeowners, and understanding the process can help reduce stress while ensuring everything goes smoothly. A roof replacement involves more than just installing new shingles—it requires careful planning, professional workmanship, and a clear timeline. By knowing what to expect at each stage, homeowners can feel more confident and prepared. Below is a step-by-step breakdown of the roof replacement process.
1. Initial Inspection and Estimate
The first step in any roof replacement is a thorough inspection by a professional roofing contractor. During this stage, the contractor examines the roof’s condition, looking for signs of wear, damage, or underlying structural issues. They will also assess the type of materials best suited for the home. After the inspection, the homeowner receives a detailed estimate that includes labor, materials, and a timeline for completion. This step ensures that both parties are on the same page before work begins.
2. Choosing Materials and Scheduling
Once the estimate is approved, the next step is selecting roofing materials. Homeowners can choose from a range of options such as asphalt shingles, metal panels, slate, or eco-friendly alternatives. Each material offers unique benefits in terms of durability, appearance, and cost. After making a selection, the contractor schedules the project, taking into account weather conditions and availability of materials. This planning phase is crucial to avoid unnecessary delays once the work begins.
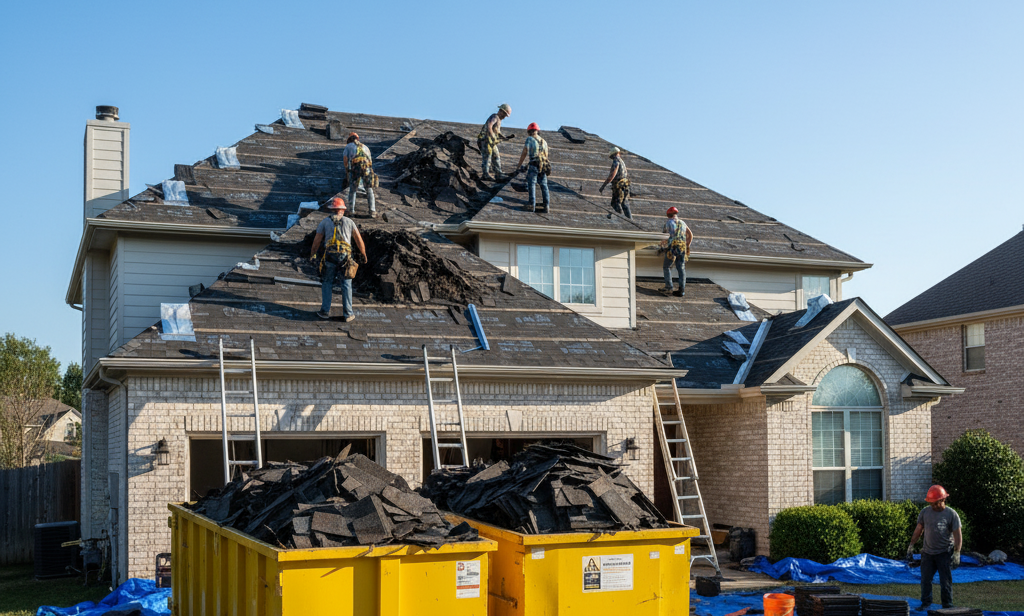
3. Preparing the Property
Before the actual replacement starts, the property must be prepared to ensure safety and efficiency. Contractors typically place protective coverings over landscaping, windows, and outdoor furniture to shield them from falling debris. A dumpster or disposal container is also brought on-site for old materials. Homeowners may be advised to move vehicles away from the driveway to provide easy access for workers. These preparations help minimize disruptions and prevent accidental damage during the project.
4. Removing the Old Roof
The removal of the old roofing material is a labor-intensive but necessary step. Contractors strip away shingles, underlayment, and other components down to the decking. This process allows them to assess the condition of the wooden structure underneath. If rotting or weak spots are discovered, repairs are made before proceeding. Removing the old roof is essential for ensuring the new installation is secure and long-lasting, rather than simply layering materials on top.
5. Inspecting and Repairing the Decking
Once the old roof is removed, the decking—the foundation of the roof—is carefully inspected. If any damaged sections are found, they are repaired or replaced immediately. This step is critical because the decking provides the base for the new materials. A solid, well-maintained deck ensures that shingles or panels can be properly attached. By addressing these issues upfront, contractors help prevent future problems such as leaks or sagging.
6. Installing Underlayment and Flashing
With the decking in place, contractors move on to installing underlayment and flashing. The underlayment acts as a water-resistant barrier that provides additional protection beneath the roofing material. Flashing, usually made of metal, is installed around areas prone to leaks such as chimneys, vents, and skylights. Together, these layers create a strong shield against moisture, ensuring the home remains protected from rain and snow. This step is crucial for extending the roof’s lifespan.
7. Installing the New Roof
After the protective layers are complete, the new roofing material is installed. The process varies depending on the type of roof chosen. For asphalt shingles, contractors start at the bottom and work upward in overlapping rows to create a watertight seal. For metal or slate, installation may require specialized tools and techniques. During this stage, contractors pay close attention to alignment, spacing, and fastening to guarantee both durability and aesthetics.
8. Final Cleanup and Inspection
Once installation is complete, the crew conducts a thorough cleanup of the property. This includes removing leftover materials, sweeping for nails, and ensuring the area looks as neat as it did before the project began. A final inspection is then carried out by the contractor to confirm that the roof has been installed correctly and meets all quality standards. Homeowners may also walk through the project with the contractor to ask questions and review warranty details.
Conclusion
A roof replacement may seem overwhelming at first, but understanding the process makes it easier to manage. From the initial inspection to the final cleanup, each step plays an important role in ensuring a safe, durable, and attractive roof. By working with a professional roofing contractor and knowing what to expect, homeowners can enjoy peace of mind and confidence in their investment. A well-installed roof not only protects the home but also enhances its value and curb appeal for years to come.